Do it Yourself [#3]: Tribal Trim Dress

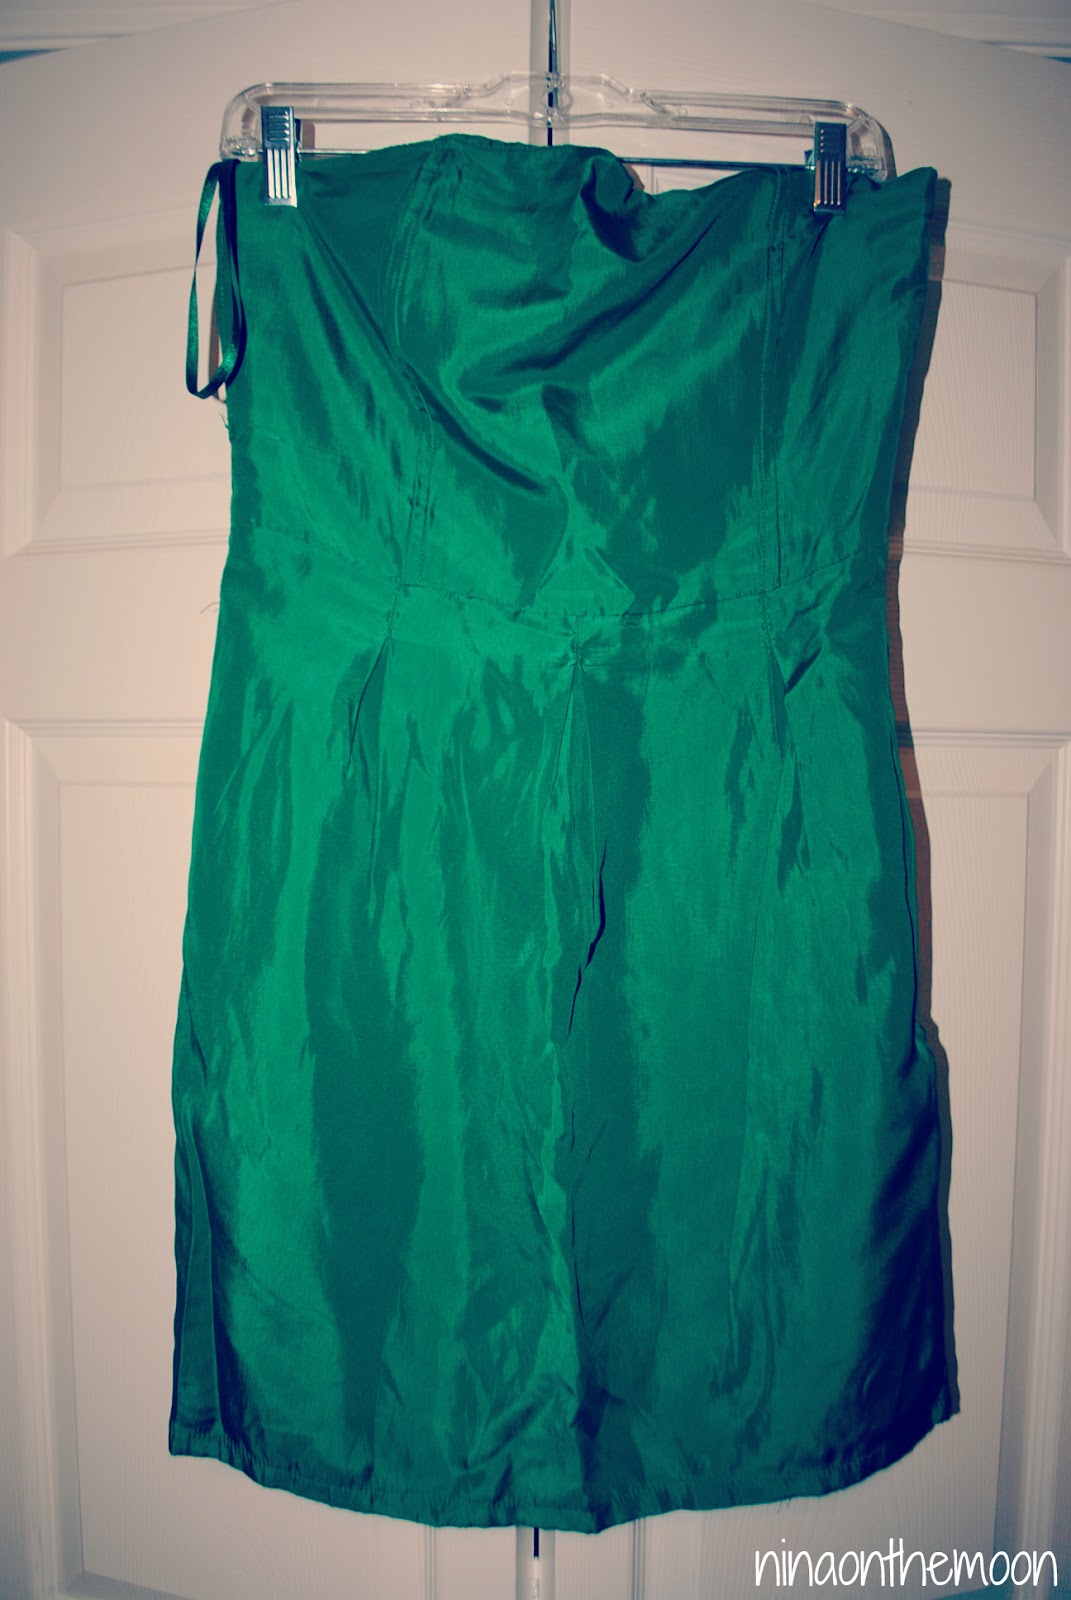
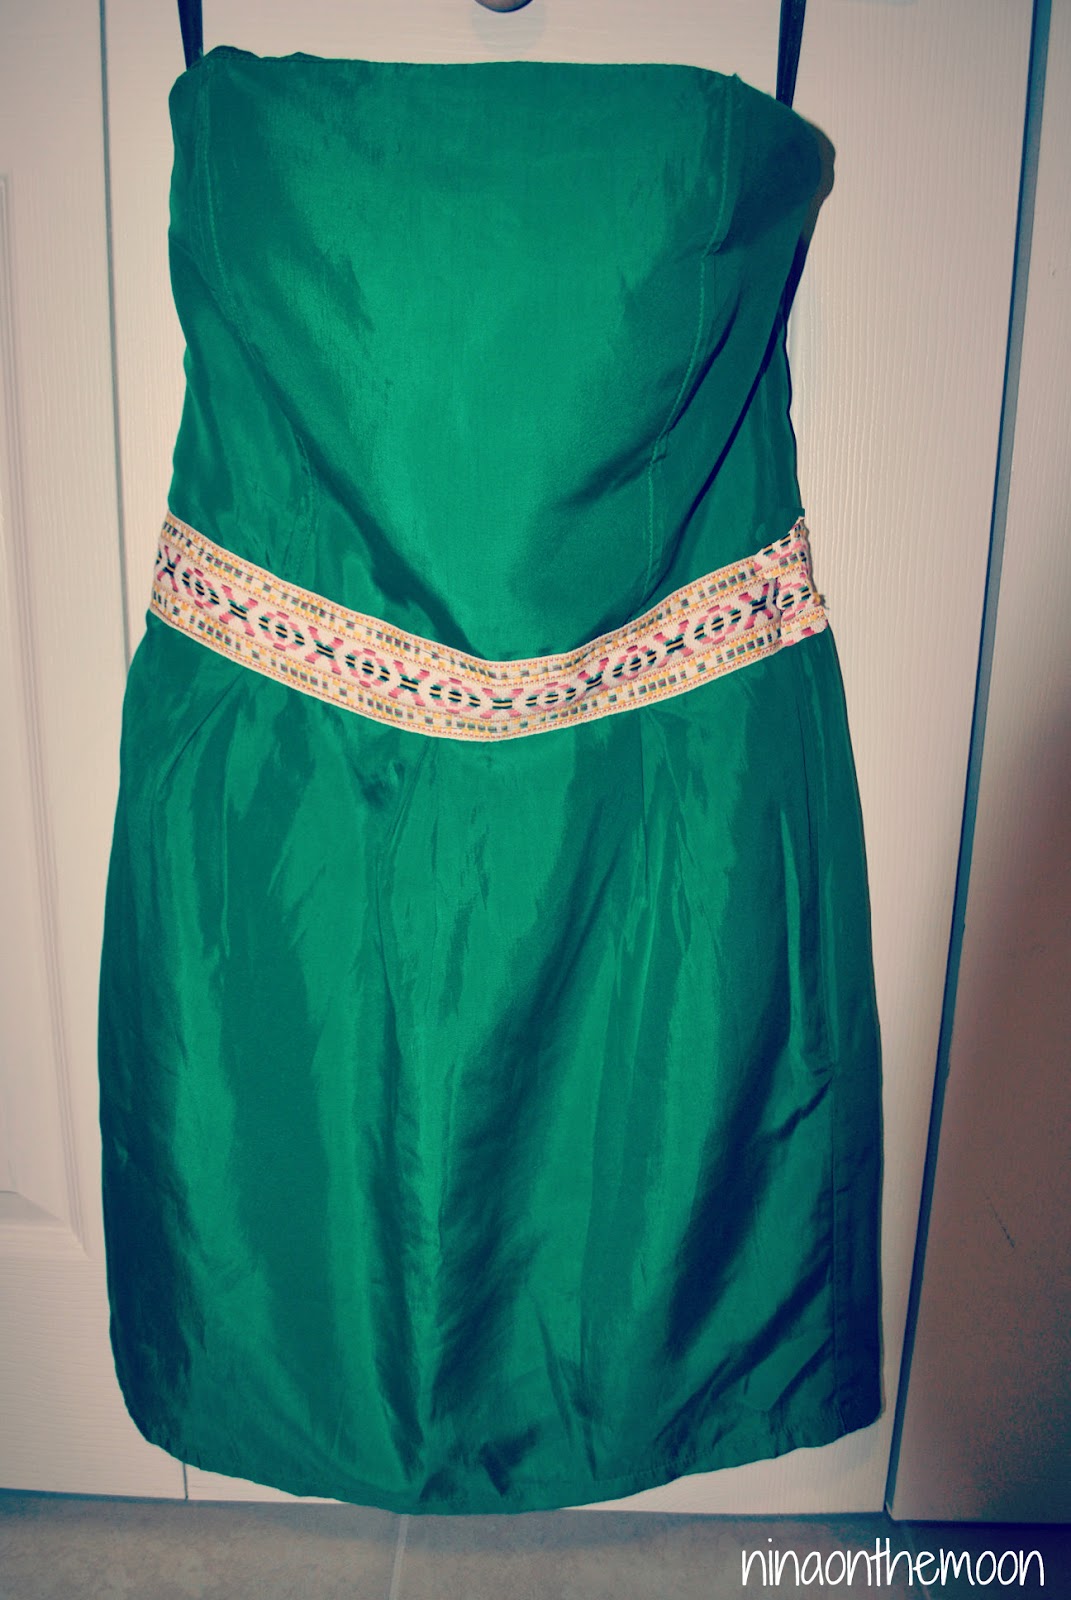
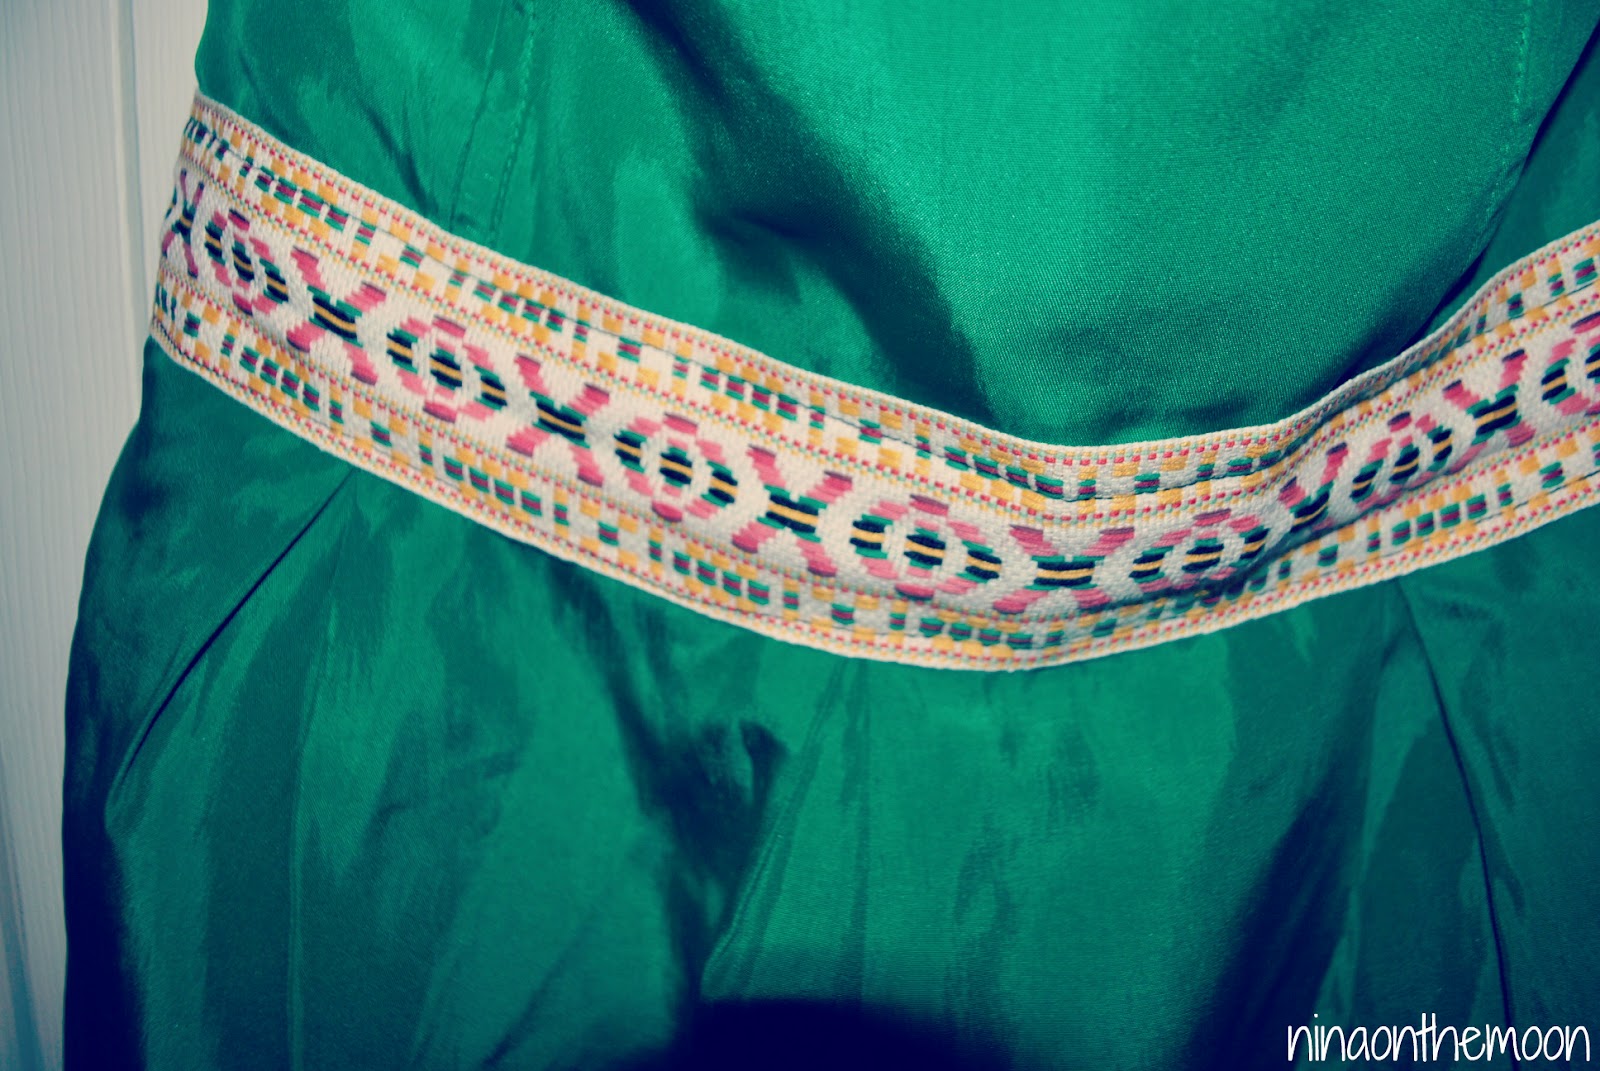
This do it yourself project is perfect for one of this years hottest trend, which is tribal print! I have had this dress for many years, and it is one of my favorite’s, since it’s one of those chameleon pieces that changes so drastically with accessories (belts, jewelry, shoes, purse). Anyways, I decided I wanted to give it a permanent change…with a tribal print! 🙂          You can find tribal trim in just about any fabric store, it all depends on your preference.Step 1: Pick your dressStep 2: Pick your tribal trimStep 3: Measure your trim around  that part you want to sew it onto, and secure with pins. I chose the middle, but you could do top, middle, bottom, sides..anything really 🙂Step 4: You can sew, or stitch if you don’t have a sewing machine…PS- I have absolutely no sewing skill, I just grab the machine and hope I don’t sew my fingers :/ Hahaha, seriously.

If you enjoyed this post, please share :)

Do it Yourself [#2]: Earring Holder

 I’ve always loved making, recycling things, and I thought it would be awesome to share some of my do it yourself projects, past and present, with you! 
There was a vintage, lop sided lamp taking up space in our bedroom, that only works when it wants to…
I’ve been thinking about recycling it for a couple days, but didn’t know how…until one day I saw the huge bag of earrings that I had made!! Tah-dah, my EUREKA moment, I decided to make it into an earring display/holder. No, unfortunately,  the one pictured above is not the one I made; that’s actually a functioning lamp and I just added the earrings onto it, via photshop, but I bet I can try to make one like that for next time! Hehehe. The one I made is pictured below 🙂
This do it yourself is SUPER EASY

You will need:

  1. Lamp Shade
  2. Acrylic paint
  3. Paint brush
Step 1: You should probably dust the lamp shade off before you start…

2: Plan your color scheme before you start painting. I just went with the flow, and did whatever. But, now that I think of it, pastel colours would have been rad, since pastel is “in” right now, hehehe. Oh well, pa la proxima! Or maybe I can paint over it later…

Step 3: Let paint dry

Step 4: Put earrings on display 🙂 You can also use it to hang your sunglasses…as I’m doing! So it has double use..

You can choose to keep your lamp shade on its base, or even take it off and place the shade on a counter on its own. I’ve done both, and prefer it on its base because you can rotate it 🙂


So whatta’ya think? Yay or nay?
If you enjoyed this post, please share :)

Do it yourself [#1]: Dip dye denim shorts

Good Morning!  
As I mentioned, in this post, I am currently obsessed with “do it yourself” projects! It is something that I have been doing almost daily, and enjoy it so much, as it is another great way to express myself creatively. I’ve decided to start doing “d.i.y” tutorials here on Nina on the Moon, with hopes that you too will be inspired to up-cycle your closet!

As you can see, the first do it yourself project, is the dip dye denim shorts. The materials you will need are
  • Jeans (or shorts)
  • Scissors
  • Bleach
  • Bucket
  • Gloves 
  • Clothes pins (or hanger) for drying
  • Tongs

First, I took an old pair of jeans, estimated how short I wanted them, and drew a line where I wanted to make the cut.

Second, I cut about one inch below the marked spot because I like folding my shorts up, giving them a little trim.
Third, I put gloves (safety, first!) on and freely poured bleach into a bucket. How much bleach you need, depends on how large/heavy your item is. Since I was going to dip dye, I poured just enough  bleach to cover the desired denim.
Fourth, I grabbed the shorts and dipped them into the bleach. You can dip the top, to bleach it and have denim at the bottom, or dip bottom, and have denim at the top! Totally depends on you! I dipped the top of mine 🙂
Fifth, you can grab your tongs, and push denim down to bleach more area, if desired.
Sixth, leave denim in bleach for about 45 minutes. Check on it half way thru, time for bleaching can vary, depending on how dark and thick your denim is.
Seventh, rinse shorts and hang to dry.
 

I usually throw recently bleached garments into a bucket of water with nice smelling detergent to get rid of the smell of bleach! Hope this was an easy d.i.y. tutorial to understand! 🙂 Happy dip dying, and please let me know if you try it out!!! 
                                                      besos, bendiciones y buenas vibras. 
If you enjoyed this post, please share :)

{Video Tutorial} Comic Strip Nail Art!

Hola Nina on the Moon Readers!
I made a this Nail Art Video Tutorial just for you all!

{background}
I came across “comic nails” one day via Cute Polish (check out Cute Polish YouTube channel as it is flooded with nail art tutorials!) & decided it would be fun to try out and guest blogging this week was the perfect opportunity! 
Hope you like it & try it out!


What you will Need: 


  1. White Nail Polish
  2. Base+Top Coat Nail Polish
  3. The Comic Section of a newspaper
  4. Scissors
  5. Rubbing Alcohol
  6. Q-tips
  7. Nail-polish remover (forgot to mention this in the video-my bad)


Ready? 


Here are the 10 Steps to create comic nails! 

  1. Paint two coats of WHITE Nail Polish
  2. Cut out your 10 pieces from the comic pages for your nails
  3. pour some rubbing alcohol into a small container (I actually used the cap of the rubbing alcohol as my container).
  4. Dip a strip into the rubbing alcohol & apply to your nail, pressing firmly for about 10-20 seconds. 
  5. Peel off & image should have transferred to your nail!
  6. repeat that step on all your nails.
  7. Apply a top coat to seal the image on your nail (this also prevents the ink from the comic from rubbing off).
  8. Now, pour some nail polish remover into a container.
  9. Dip a Q-tip into the nail-polish remover and clean the edges around your nail.
  10. Viola! You have yourself a comic manicure! 
Whaaaat? 😀
Just like that?
yep!
Just like that! 🙂


Let me know what you all think! 
& if any of you have tried this one before 🙂

Is there any other Nail Art DIY you suggest to me? I love discovering new ones! 

xoxo!
Des, Mano y Metal.


If you enjoyed this post, please share :)